Are you nursing an injury to one of the major muscle groups in the body? Do you still want to stay in shape without aggravating the condition?
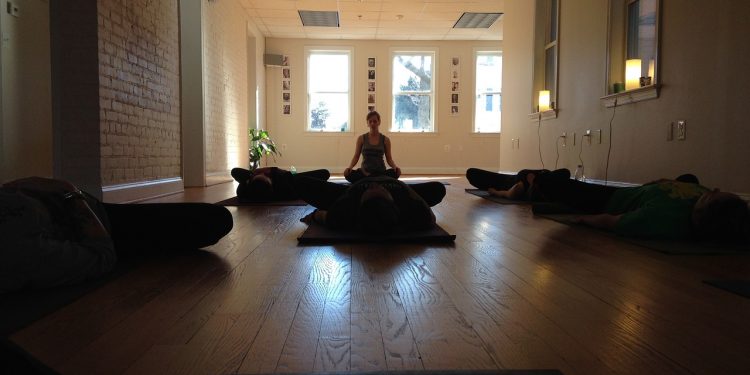
If your answer is yes, then this post on Yin Yoga–a slow-paced version of traditional Yoga–is for you. I understand how challenging it can be to not put on a few extra pounds during an injury layoff. Even a strong-willed, disciplined and focused person can find it difficult to cope with the stress and anxiety associated with an injury.
On the other hand, there are people who–for one reason or another– don’t want to put immense pressure on their body. There are plenty of people who don’t like to lift heavy weights or go out for a run every morning. If this sounds like you, how are you planning to stay fit and healthy? Do you have a fitness plan? Yin Yoga can be an easy solution for someone like you.
What is Yin Yoga?
Yin Yoga is an ancient exercise program that combines the principles of Traditional Chinese Medicine, with asanas (postures). Unlike traditional yoga or western body-weight exercises like Pilates, the postures in Yin Yoga are held for a longer duration (typically 30-45 seconds).
I know you must definitely have heard about the Chinese concept of yin and yan. This is where the name Yin Yoga comes from. Although the postures in Yin Yoga are derived from Indian Hatha Yoga, the guiding principles come entirely from China.
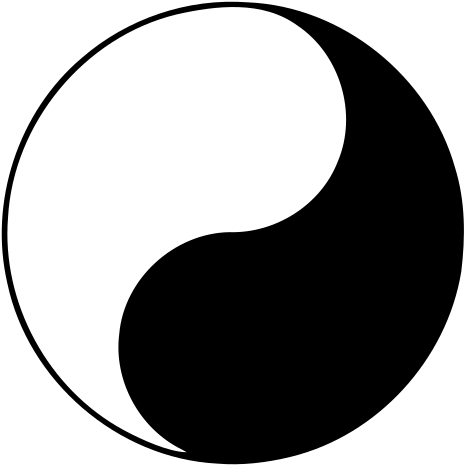
This is what Yin and Yang typify: Yin and Yang is a traditional Chinese concept of dualism. Yin represents stable, immobile, passivity, feminine, and negative. Whereas Yang characterizes the brightness, changing, masculinity, freedom and positive.
As you can see from the picture above, both are opposite of each other. However, according to the Tao, they can still be complementary, interconnected, and interdependent. I hope you are getting the point.
As far as Yin Yoga is concerned, it is believed that the soft body parts like Blood, Adipocytes, skin are Yin and the stiff connective tissues like Areolar, Adipose, and Reticular are Yang.
Likewise, the low-intensity exercises are considered Yin whereas the high-intensity routines are said to be Yang. Hence, Yin Yoga consists of comfortable, relaxed, outcome-independent and slow-paced exercises.
Is Yin Yoga Really Effective?
Let’s get one thing straight. You are not going to burn off stubborn belly fat as a direct result of practicing Yin Yoga postures. Yin Yoga does work like any other weight loss exercise. Its effect is subtle and indirect.
So, when it comes to losing weight, Yin Yoga can speed up the process by improving your digestion, keeping you in a happy and cheerful mental state, and increasing the metabolic rate of your body.
Research by several reputed institutions suggests that Yin Yoga is one of the easiest ways to deal with stress and anxiety. A combined study by Swedish and UK-based universities concluded that Yin Yoga can be an effective way to decrease stress and worry when combined with mindfulness exercises.
They made participants practice Yin Yoga along with mindfulness for five weeks straight. All participants were more happy and content at the end of the program. In conclusion, Yin Yoga is absolutely effective in keeping a person mentally and physically healthy.
The Best Yin Yoga Poses to Help You Keep Your Mind and Body Fit
1) Caterpillar Pose
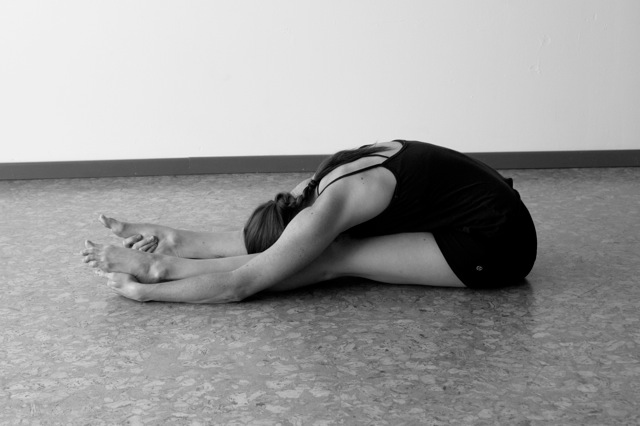
To perform caterpillar pose (or also known as seated forward bend or intense dorsal stretch), you need a yoga mat and a towel or a pillow for arch support.
Step 1:
The first step is to sit down on a towel/pillow with your feet forward and place both your arms on your hips.
Step 2:
Next, keeping your back erect extend forward and touch your calf. Curl up your body like a caterpillar and try to stretch in a forward direction. At this point, continue to breathe as usual.
Step 3:
Next, stretch even further and touch the base of your toes with elbows at the side of the knees as shown in the picture above.
Hold this position for about five minutes and get back to the default position later. Repeat the routine 3-4 times in each Yin Yoga session.
2) Saddle Pose
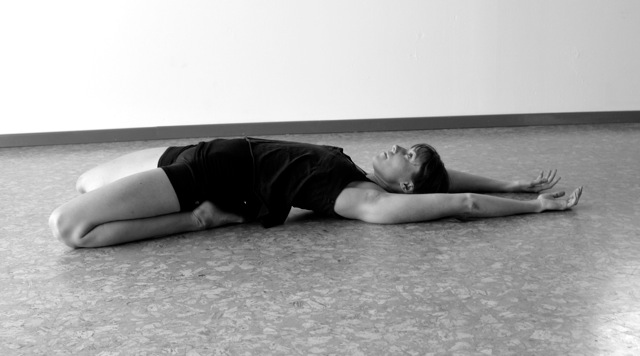
The Saddle pose is also known as Virasana in Sanskrit.
Step 1:
To get started, get a mat and sit on your heels with your hand behind you for support.
Step 2:
The next step is slowly fall back using your hands for support. At this stage, let your buttocks rest on your heels. And rest your upper body on both of your elbows. Feel the stretch in your abdominal muscles.
Step 3:
The final step is to fall even further and rest on your back. As you can see from the image above, the buttocks of the Yin Yoga practitioner are still rested on the heels. Rest in this position for five minutes and repeat the routine 3-4 times per session.
3) Square Pose

The square pose is by far the easiest posture in Yin Yoga. It is also known as Svastikasana in Sanskrit.
Step 1:
To get started with the square pose, sit cross-legged on the floor or a mat with your right toe rested on the left knee.
Step 2:
Next, make sure you are comfortable and the legs are loose and wobbly. Keep your arms on the knees and rest in this position for 3-4 minutes. In this posture, you don’t need to move or stretch your body. It’s a totally passive and effortless posture.
4) Sphinx Pose
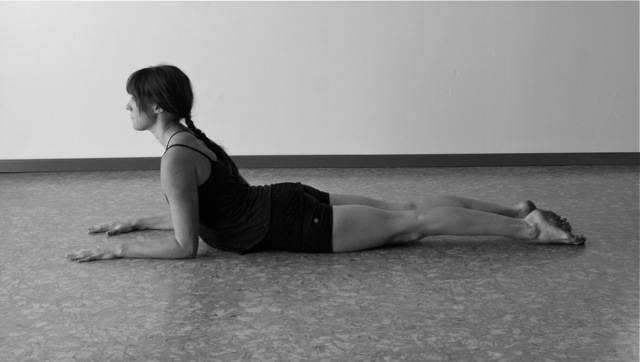
This is another easy posture for those with physical injuries or movement limitations. Sphinx pose is also known as baby cobra pose.
Step 1:
To get started, lay on your belly on a yoga mat. Keep your hand forward and legs half and feet apart.
Step 2:
Next, make sure your shoulders are in alignment with your elbows. As you can see from the picture, the Yin Yoga practice is not making any effort to raise the hip above the floor. So, let the base of your abdomen and hips rest comfortably on the floor.
Step 3:
Hold this pose for 3-4 minutes. You can rest by placing your upper body on the floor in between sets. Repeat the routine 4-5 times per Yin Yoga session.
You can enhance this asana’s power by getting some good yoga mats.
5) Swan Pose
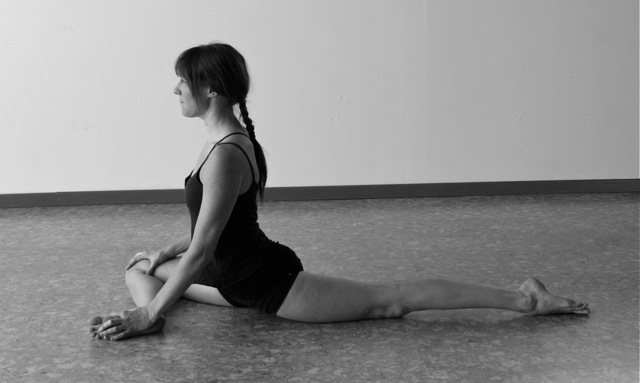
Swan pose is beneficial for those with tight hip flexors. It opens the hips and strengthens the muscles around it. The Sanskrit name of Swan pose is called Salamba Kapotasana.
Step 1:
Begin from a tabletop position. Extend the left knee forward and let the right leg rest behind. Do not worry if you are unable to attain the perfect swan pose in your first attempt.
Step 2:
You can use a pillow or a towel to fill up the gap in between your hips and the floor. Doing this will help you hold the position for a longer duration.
Step 3:
The final step is to lift your upper body and keep your eyes straight. Rest your left arm on the left foot and the right arm on the left knee as shown in the picture above. Hold the position for about 3-4 minutes.
Step 4:
Repeat the same steps with the right leg. You can perform this routine 4-5 times with each leg per Yin Yoga session.
Conclusion
To reiterate, Yin Yoga is the complete opposite of a traditional Yang workout session. There is no heavy lifting, stretching the major muscle groups, running, or jumping. Intensity-wise, there is no other exercise form as passive as Yin Yoga. The passive postures help rebuild and reinvigorate the softer parts of your body like blood vessels, cartilage, skin, soft tissue, etc.
Also Read- Yoga for Sciatica: Best Restorative Yoga Poses